When you’re looking for healthy cooking oils to use in your kitchen, beef tallow is at the top of the list. It’s packed with nutrients and as unprocessed as you can get! In our instruction on how to make beef tallow we focus on a simple crockpot method, but you also get advice on how to make beef tallow in a pot on the stove or a metal pan in the oven. Rendering homemade tallow has been one of the greatest learnings for our home.
How To Make Beef Tallow
For those who aren’t familiar with tallow, it is rendered beef fat. If you own cows, rendering it is a great way to utilize a portion that otherwise might get tossed. If you don’t (like us right now), it’s still a nice way to take part in a system that reduces waste and values all parts of the cow.
Making tallow requires a bit of time, but most of it is hands-off. It’s been a seriously money-saving skill for us. Quality, healthy oil at a great price. Our butcher gives us beef suet for free, so maybe yours will too!
More On Tallow
Several areas of the cow contain fat trimmings, but suet is considered to be the best of the best. It is fat that surrounds the kidneys and loins.
Some of its benefits include that it is rich in nutrients, has a high smoke point, has a creamy texture, has a long shelf life, and has anti-inflammatory properties.
Supplies You’ll Need
Grass-fed beef suet– If you can source it, grass-fed beef suet is going to give you the highest quality product. Check with your local butchers, farms, and cow-raising neighbors first!
Crockpot– You can set the crockpot to “high” and it will slowly cook down the suet with minimal maintenance on your end.
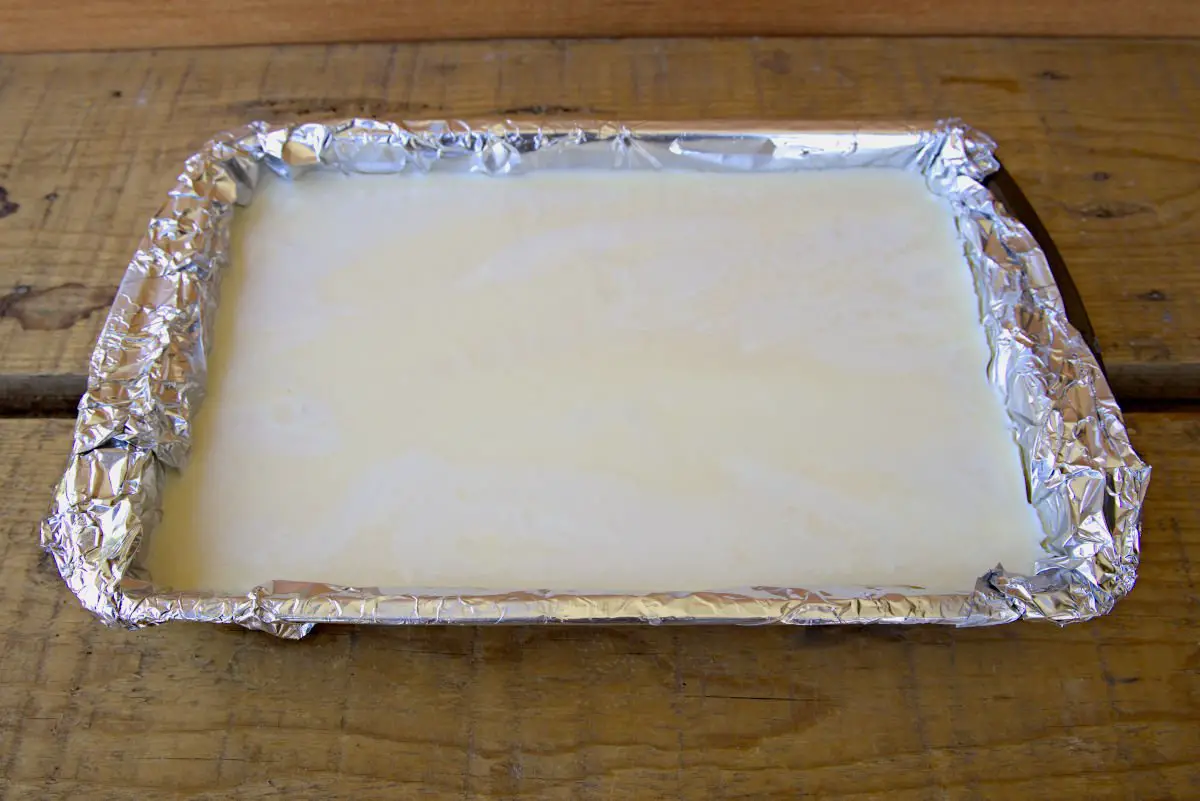
Baking dish– We use a foil-lined baking dish to pour our rendered tallow into so that we can harden it into one large piece to then slice it into chunks. It isn’t necessary to use this method, but I find it very easy to use my hardened tallow when it’s already in pre-cut chunks stored in the jar.
Ladle– You’ll use a ladle to help transfer your rendered tallow into a storage container.
Funnel– You’ll use a funnel to transfer your tallow into the baking dish or other glass containers.
Cheesecloth, coffee filters, or mesh strainer– If you aren’t worried about removing all the impurities from your oil, a mesh strainer will do the job. But, we like to use cheesecloth or coffee filters to help purify our tallow to ensure it has the longest shelf life (since we keep ours at room temperature).
Helpful Tips
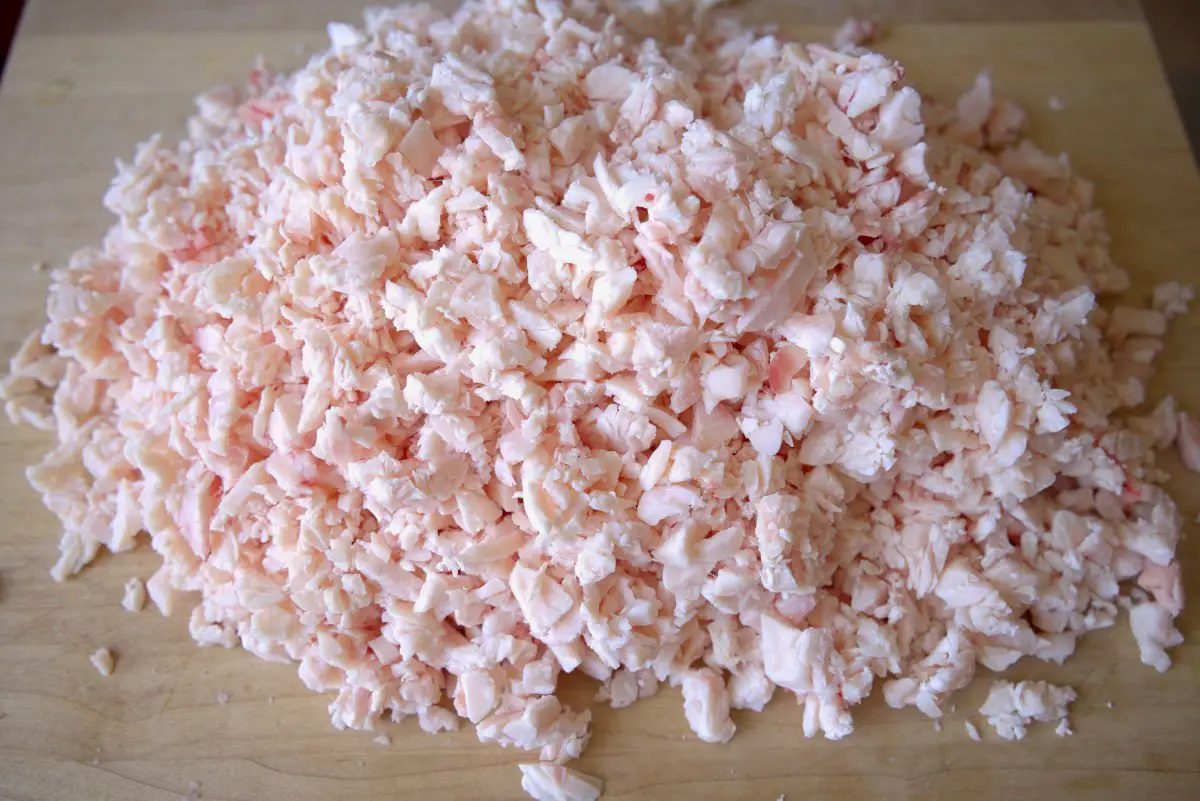
Ask your butcher for help. If they’re willing to grind the tallow for you, it can save you a step in the rendering process. Some people use a food processor at home to grind up their beef tallow, but I find it messier than it’s worth. It doesn’t take long to mince the suet with a sharp knife on a cutting board.
Cut it into small pieces. Making tallow can take up to 24 hours if you’re starting from larger chunks and with a larger amount, but if it’s minced finely it will cook down quicker. When we start with close to 5 pounds of suet, ours usually takes around 8.5 hours.
Start early. Rendering your tallow can be a long process, so start early in the day to ensure you finish before the evening bedtime hours.
Consider placing your crockpot outdoors. The odor from beef suet cooking down can be intense. To keep the smell from invading your house, try finding a spot outdoors or with excellent ventilation to cook down the fat.
Check it often. When using a crockpot, a pot on the stove, or a pan in the oven, you’ll want to check your tallow every hour or so. It’s important to stir your suet to keep it from burning on the bottom of the pot or pan. This is especially important in the early hours before a layer of liquid tallow has developed.
Rendering The Tallow
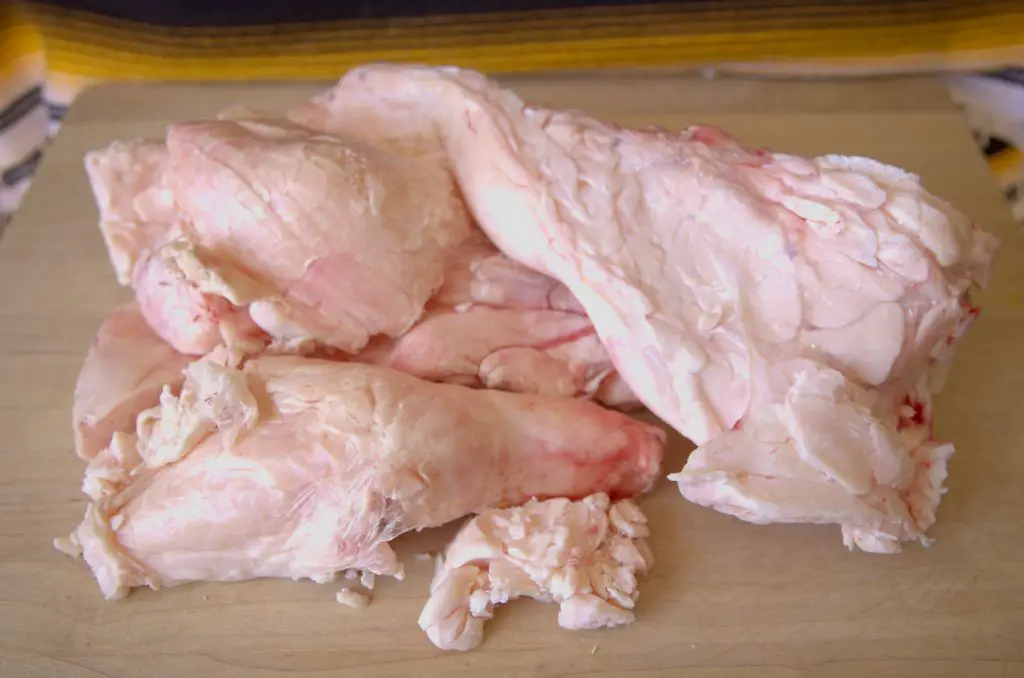
- Prepare suet. If you’re starting with a large chunk of fat, mince it into small pieces. The smaller the pieces, the quicker they will cook down. Starting with cold fat will make the job easier.

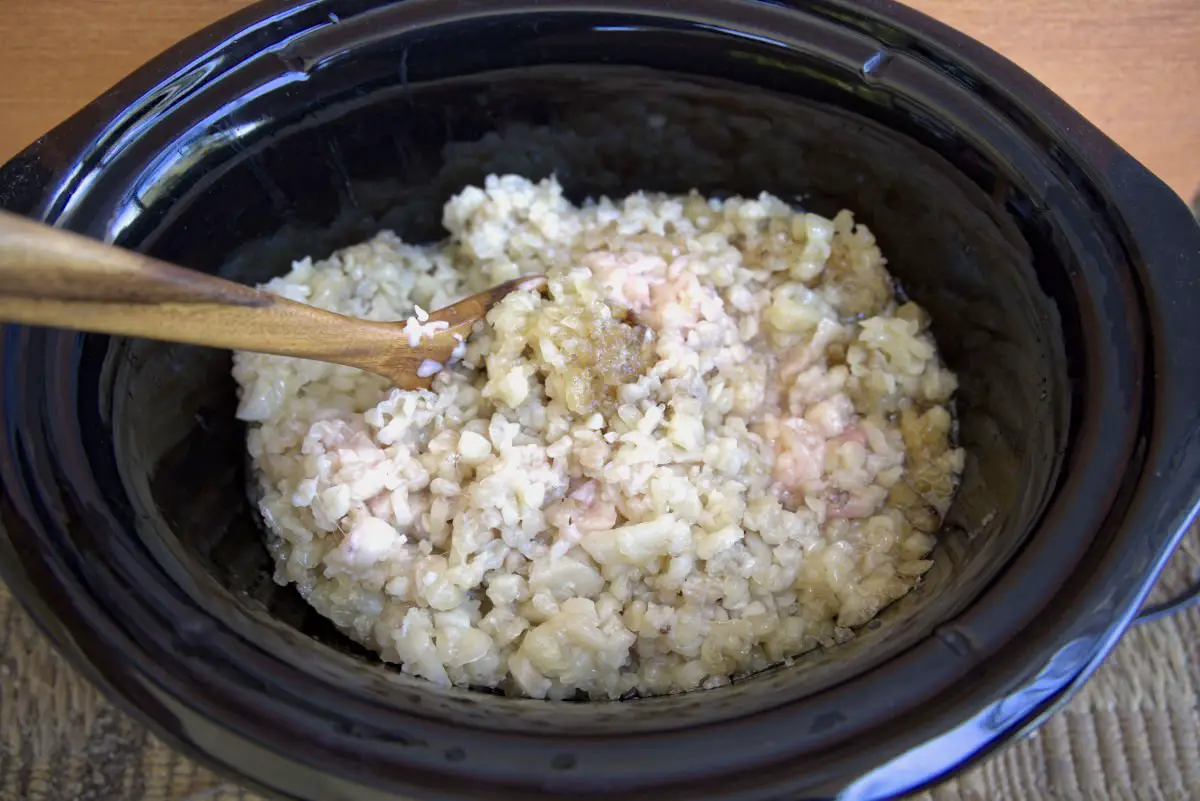
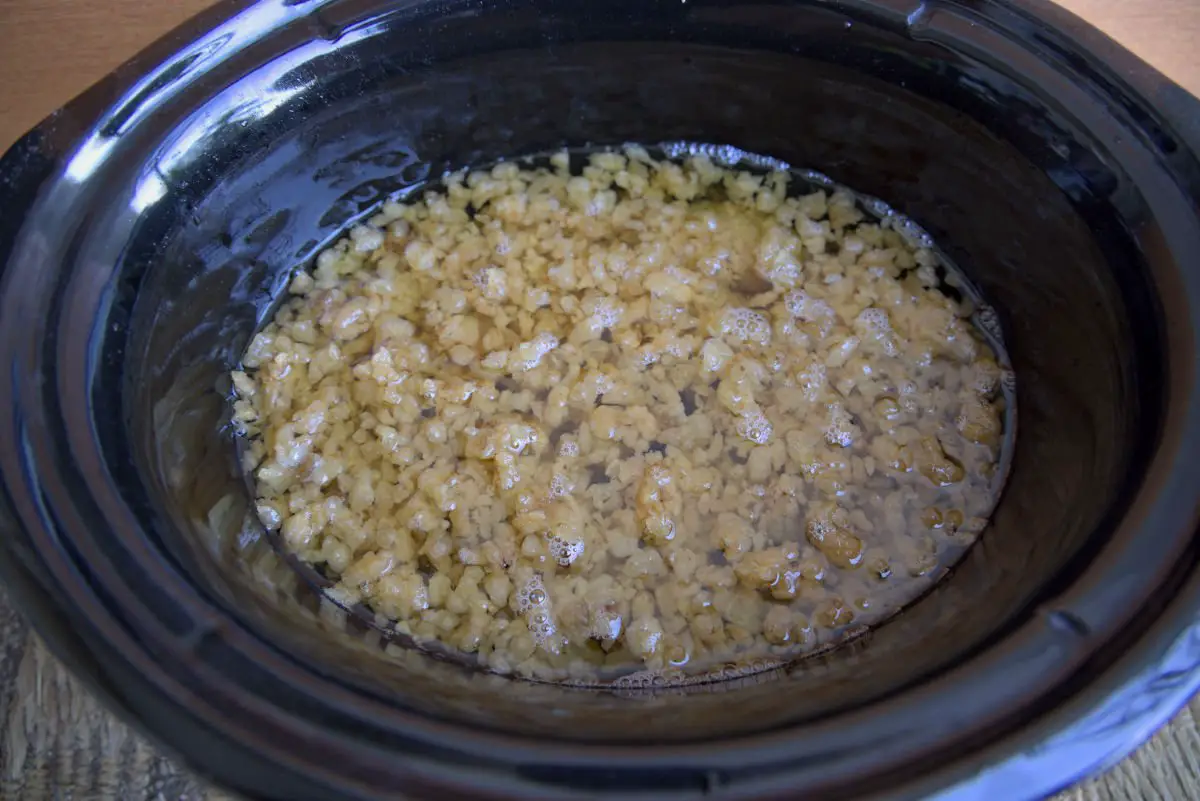
- Place in crockpot. Place the beef suet in a crockpot and set it to “high”. Place the lid on and leave it. The below photo was taken 2 hours into the process.
- Stir occasionally. For the next several hours, you’ll want to check your suet every hour or so (especially in the beginning hours) and stir it. This will prevent it from burning at the bottom of the pot. Ours usually takes around 8.5 hours to render completely, but don’t be surprised if it’s double or even triple that under some circumstances (lower heat, larger fat pieces, more fat in pot). It is done when you just see liquid and cracklings in your pot. The white color will have completely liquefied. The photo below was taken 7 hours into the process, and our tallow was ready to be strained at 8.5 hours.
- Filter. Use a mesh strainer inside a funnel or a funnel lined with cheesecloth/coffee filters to filter your finished tallow. The tallow will harden rather quickly, so this step should be taken soon after the rendering process is complete. We like to funnel ours into a foil-lined baking dish, but you can funnel it directly into jars if you prefer.
The benefit of using a shallow baking dish is that you can cut your tallow into usable chunks once it has cooled. Otherwise, the tallow will harden directly in your jars and you’ll use a knife to cut out chunks as you need them for cooking. - Allow to cool. Allow it to cool to room temperature before placing it in the fridge or freezer.
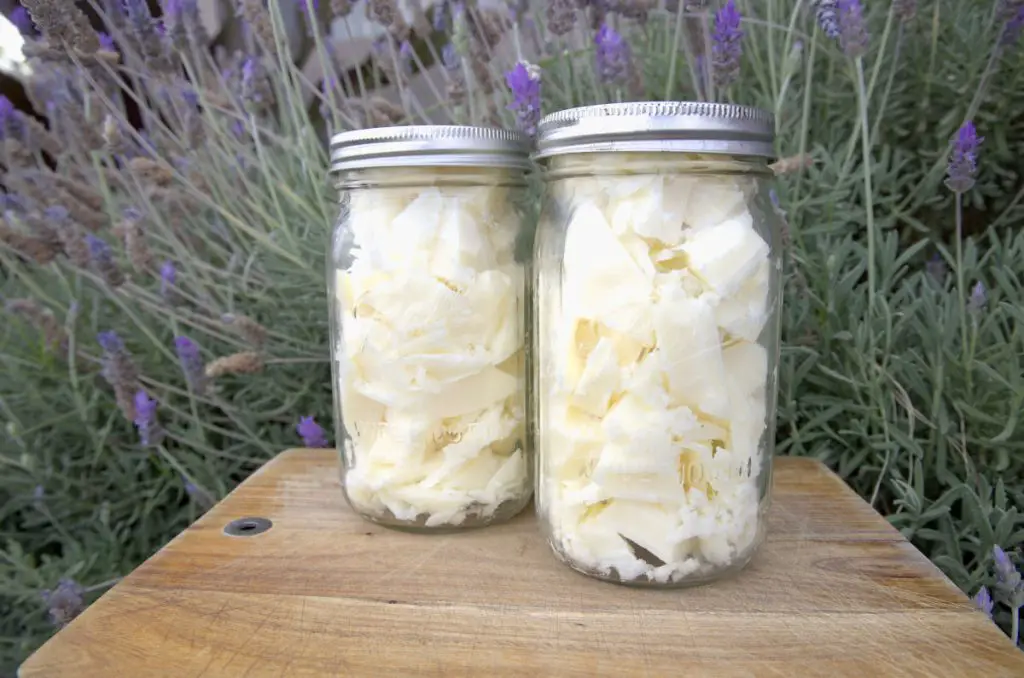
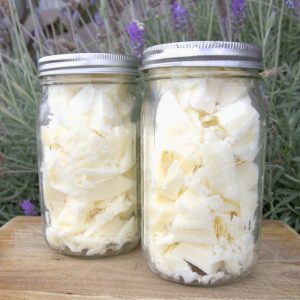
- Slice & store. If you are choosing to slice it, remove the foil from the pan (the tallow will be in one solid piece) and slice the block of tallow crosswise into 1-inch chunks. Place them in glass jars for storage. We leave our tallow out at room temperature but feel free to place it in the fridge or freezer. Our tallow lasts at least a year!
Other Cooking Methods
While we find the crockpot method most efficient, you can certainly render tallow on your stovetop or in your oven.
On the stove, simply place the minced fat in a large pot, set the heat to medium-low, and wait for it to render down. You’ll want to stir it every hour or so like you would in a crockpot.
In the oven, set the temperature to around 250 degrees F, place your minced fat in a large metal pan, and wait for it to render. Make sure to check and stir it frequently.
Dry Rendering Vs. Wet Rendering
The dry method is as we have described above. The wet method places water at the bottom of the pot along with the suet which can help separate the fat from the connective tissue and protein as well as keep the fat from burning at the bottom of the pan.
We use the dry method for rendering, and we’ve never had any issues with beef fat burning at the bottom of the pan as long as we stay on top of stirring it every hour or so. It also makes us feel better about storing our rendered fat at room temperature since it doesn’t contain that extra water to potentially attract bacteria.
Uses In And Beyond Cooking
Tallow is an excellent substitute for cooking fats such as lard, butter, or vegetable oil. Want to use tallow but don’t want to go through the trouble of making it? There are options available.
In the kitchen, some of our favorite uses for tallow include roasting vegetables, frying foods, slow-cooking meats, sauteeing foods, cooking eggs, using for pie crusts, and melting for use in baked goods.
You can also use your tallow for bath and beauty products! Some amazing soaps, lotions, and shampoo bars are made using tallow.
I look forward to someday making the time to experiment with a few of those. It will happen.
FAQs (Frequently Asked Questions)
While tallow is made from beef, it has a relatively mild/neutral flavor. It might contain a rich and savory undertone, but it is often used in baking as well.
There are several sources for purchasing quality beef suet on the internet. If you search for reputable online butcher shops or specialty shops, you should be able to find suet for purchase. Don’t forget to ask around at your local farmer’s market or talk to your local ranchers first!
While beef suet is the traditional choice for rendering tallow because of its high fat content, you can use beef trimmings. Trim away lean meat and mince them into small pieces to render.
Recipes Using Tallow
Tallow is by far my favorite fat to use for frying. These are some classic recipes that it shines in.
Beef Tallow
Equipment
- crockpot
- cheesecloth or coffee filters
- baking dish
- Ladle
- Funnel
Ingredients
- 4.5 lb beef suet, minced
Instructions
- Place the beef suet in a crockpot and set it to “high”. Place the lid on and leave it.
- For the next several hours, you’ll want to check your suet every hour or so (especially in the beginning hours) and stir it. Your suet might take anywhere from 8-24 hours. It is done when you just see only liquid and cracklings (dark brown pieces) in your pot.
- Use a funnel lined with cheesecloth/coffee filters to filter your finished tallow. The tallow will harden rather quickly, so this step should be taken soon after the rendering process is complete. We like to funnel ours into a foil-lined baking dish, but you can funnel it directly into jars if you prefer.
- If you chose the baking dish method, once the tallow is cooled you can cut it into 1-inch chunks and then place those chunks into airtight containers for storage.

Leave a Reply