Not sure what to do with your huge mid-summer tomato harvest? Homemade tomato paste for canning could be the answer you’re looking for. I set out on a task to attempt homemade paste from store-bought tomatoes, and to be honest I’m not sure the time and effort paid off. BUT, I still have hope that a garden bounty of paste tomatoes could be magical as a tomato paste for canning.
Homemade Tomato Paste For Canning
You need pounds of tomatoes and you need time. Learning how to make tomato paste might not be the first thing you’d think of as far as making food from scratch when there are cheap, simple ingredient options at the store. But, to learn a skill is invaluable. At some point I’ll try planting a certain variety of paste tomatoes and see where that gets me, but until then here’s my experience with making an approved tomato paste for canning recipe from the National Center for Home Food Preservation with a big box of tomatoes from the local market.
Choosing Your Tomato
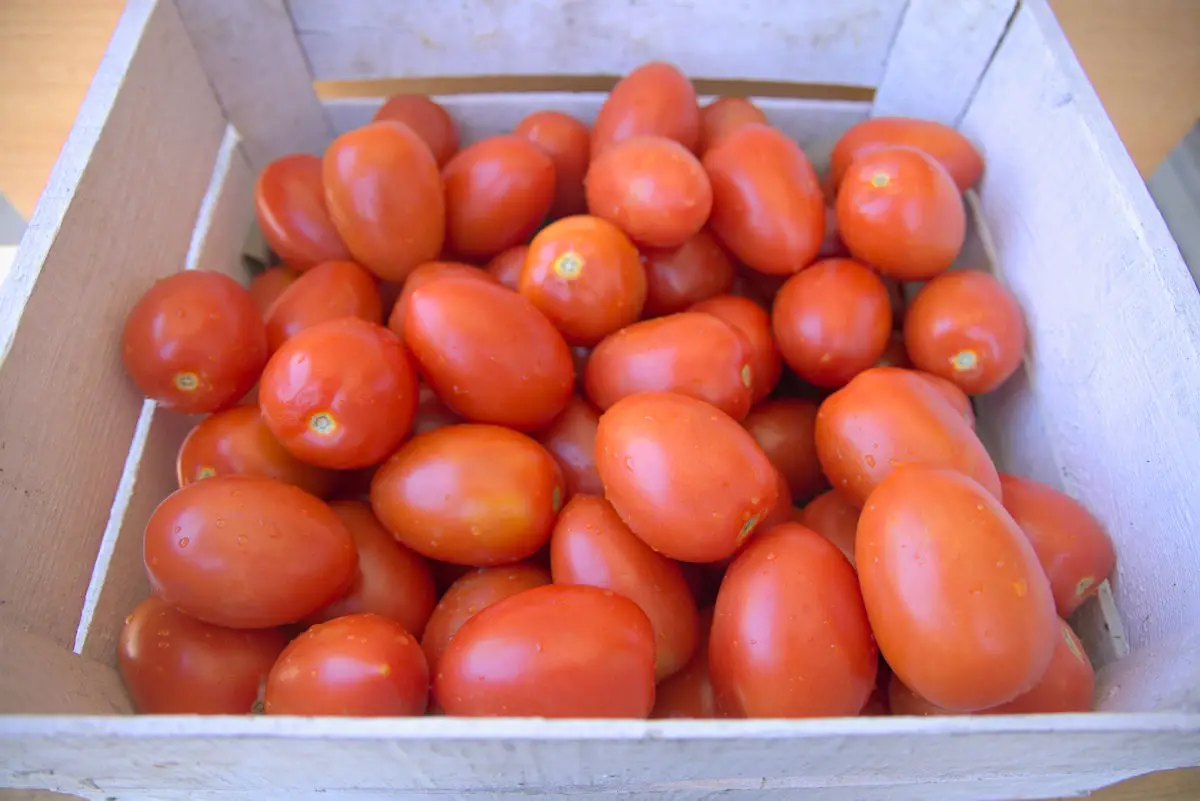
Choose your tomato wisely. Every tomato has its purpose, and for tomato paste, you’ll want to choose one that is meaty and not too watery. Roma-style tomatoes are ideal as a low-moisture, low-seed style. Remember that tomato paste is basically all tomato, so the flavor and quality of your tomatoes will greatly affect your end result. Look for tomatoes that are bright red and at peak ripeness.
Growing your own tomatoes will inevitably provide the best flavor, and there are many paste varieties to play around with. Let me know if you try one you love!
Citric acid (or bottled lemon juice) is a necessary ingredient when water bath canning any variety of tomatoes. Tomatoes sit around neutral on the pH scale, so to ensure they are preserved safely, you need to slightly alter (raise) their acidity. Don’t use fresh lemon juice. Bottled lemon juice has been uniformly acidified so that it has a reliable acid level and will guarantee the safety of your canning.
How to Make Tomato Paste
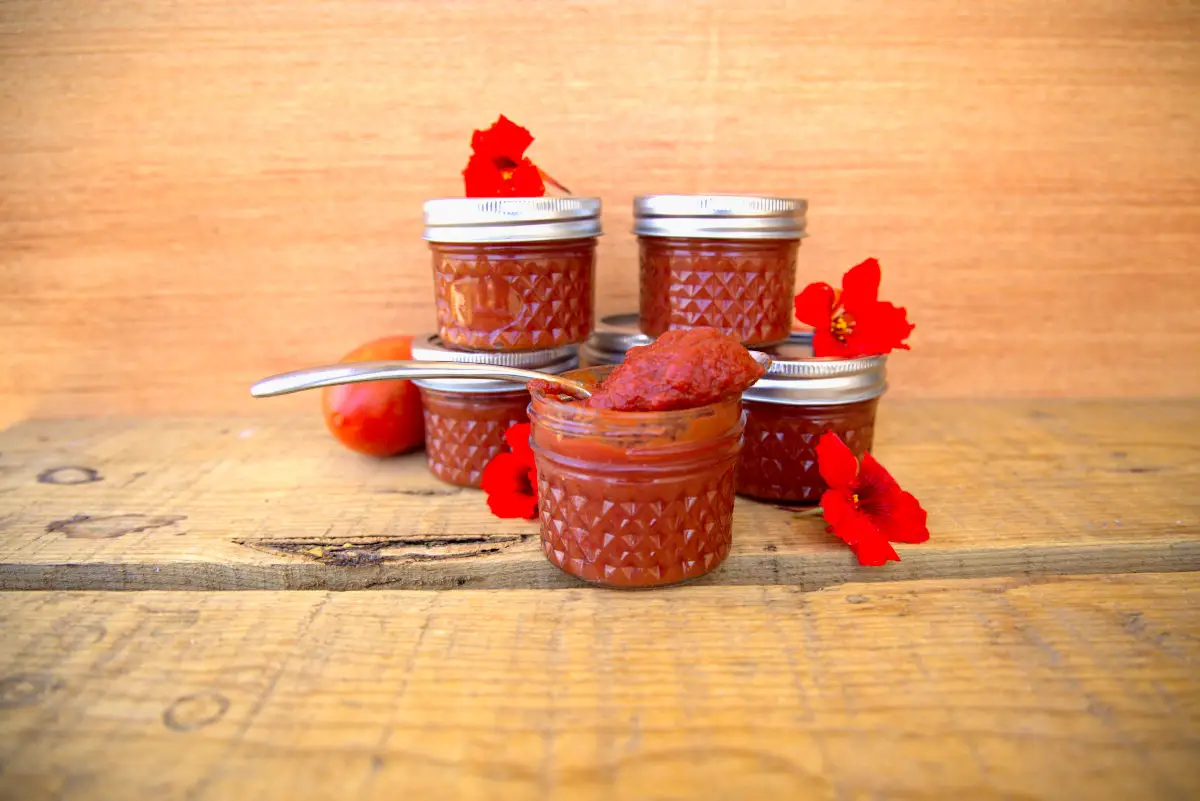
If you’ve ever made tomato sauce, then you’ve made it about three-quarters of the way to making tomato paste. In this recipe, you start with 16 pounds of tomatoes (after coring should be around 14), and I ended up with 12- ¼ pint jars of tomato paste.
First, you’ll want to wash all your tomatoes and core them either with a tomato corer or a serrated knife. You’ll chop your tomatoes into quarters (seeds and skins still intact) before placing them in a large stockpot. You can leave the seeds and skins on as long as you have a food mill or sieve to press the tomatoes through after boiling them down. If not, you can go through the extra step of blanching, peeling, and seeding before cooking them down.
I actually took some advice from another blog about cutting the tomatoes one pound at a time and adding them to the hot pot quickly to hold the tomato juices together. It seemed to work well. So, one pound at a time I cut, placed in the pot, and mashed my tomatoes…..adding and mashing as I went until all the tomatoes were processed.
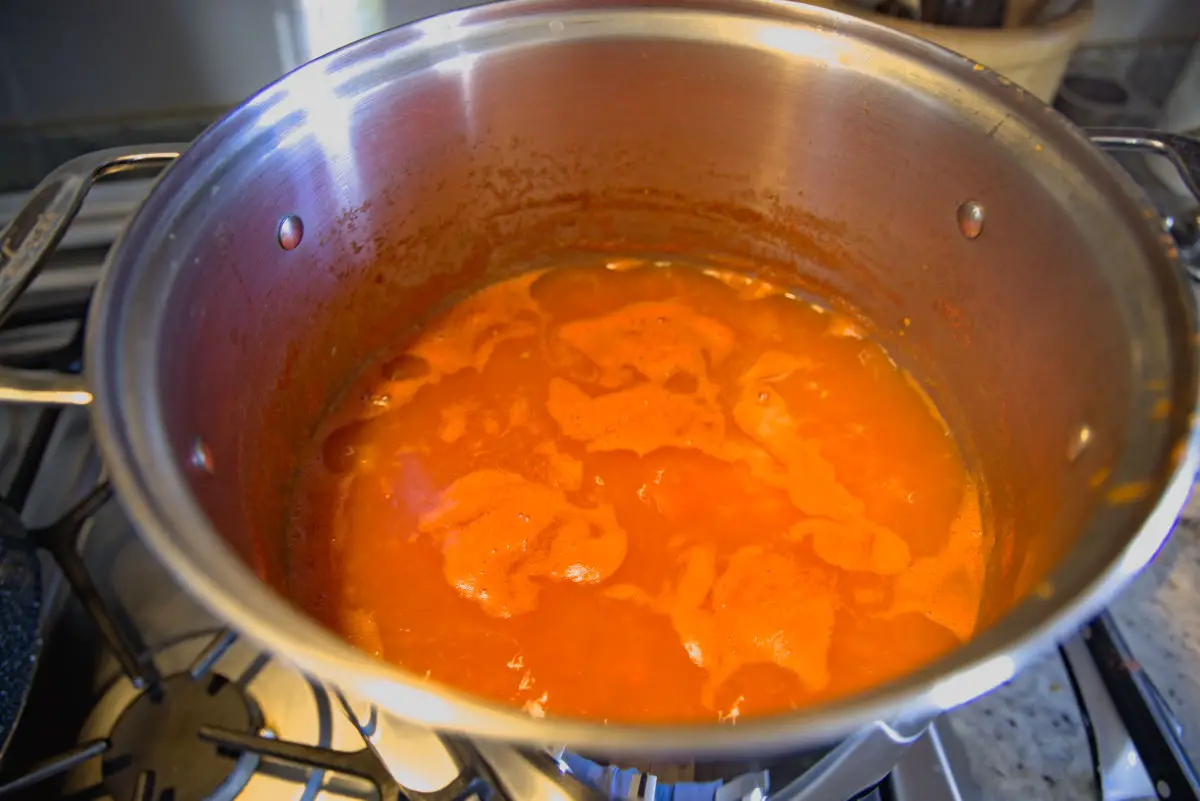
Now comes the first waiting period. After reaching a boil, you’ll want to reduce the heat and simmer your tomatoes until they’ve reduced by about half and the vegetables have cooked down (you will notice the skin floating around). Stir frequently to avoid tomato sticking and burning on the bottom of your pot. This will take around 1-1 ½ hours.
Press your tomatoes through a sieve with a wooden spoon in batches or use a food mill. I will say that using the sieve and spoon method was tiresome, and it certainly added to the effort in the overall process. I think a food mill purchase might be in my future for all this tomato processing.
Don’t use a food blender or food processor at any point to blend the tomatoes. It will add extra air to the paste that will hinder the canning process later on.
Now comes the second waiting period. Return the thinned tomato mixture to the stove in a large saucepan and add in the citric acid (or bottled lemon juice)- stirring to incorporate. Add in the salt and optional bay leaf and garlic. Stir to combine.

Continue to simmer tomatoes on medium-low until the mixture is reduced by about another ½ and resembles a thicker paste. When it can hold its shape on a spoon, it is ready to be canned. This can take anywhere from 2-5 hours. Make sure to stir it frequently. Remove the bay leaf and garlic clove from the pot and continue canning your paste.
Canning Tomato Paste
If you’re new to canning, check out this resource and others for a thorough overview. It’s important to have a good understanding of the process and the requirements before diving headfirst into canning. Sterilization is key to a successful and safe canning process. There are kits available (which I purchased upon my first time canning) that provide most of the necessary tools for getting started.
While the tomato paste is nearing its end of thickening, prepare your jars and lids for canning. I was able to fill 12- ¼ pint jars, but the recipe actually states that it makes 8- ½ pint jars. You’ll be able to judge how much it will produce closer to its finish. You can use ¼ pint jars and still use the same processing time, but don’t use a larger jar than ½ pint.
Once your jars are heated, you can fill them via a funnel with the hot tomato paste. Leave ½ inch headspace and use a small rubber spatula to remove air bubbles before putting the lids on. Gently tighten with the bands and place your jars back into the water bath at a boil.
Once boiling, process for 45 minutes (accounting for the altitude in your processing time). Turn off the heat and let the jars sit in hot water for another 5 minutes. You can remove them and place them on a clean towel to cool. You might hear the popping sound of them sealing, but give them 12-24 hours before checking for a proper seal. If you press on the lid and it doesn’t budge, it is sealed!
You can store your jars in a location out of direct sunlight for at least a year. Don’t forget to label and date them! We use blue painter’s tape and a sharpie for legibility and then easy removal.
For extra assurance before canning, test your tomato paste’s pH level. If it is below (in numerical value) 4.6, then it is safe to can!
FAQs (Frequently Asked Questions)
The canning process typically takes several hours, including preparation, cooking, and processing time.
Yes, you can add herbs like basil or oregano, and spices like garlic or onion powder for added flavor.
Yes, you can refrigerate tomato paste for short-term use. Canning is for long-term preservation.
More Canning Recipes
Canning is a great way to preserve fresh, seasonal produce, and it allows you to do prep work for busier times.
- Canning Marinara Sauce (Garlic-Herb Recipe)
- How to Make Whole Grain Mustard
- Homemade Ketchup For Canning
Homemade Tomato Paste for Canning
Equipment
- 1 large stainless steel pot
- 1 tomato corer (optional)
- 1 fine mesh strainer/sieve or food mill
- 1 large saucepan
- 1 water bath canner and tools
- 1 large metal or wooden spoon & ladle
- 12 or more ¼ pint jars with lids and bands
Ingredients
- 16 lbs Roma (paste-style) tomatoes 14 lbs after coring
- 1 tsp citric acid
- 1 tsp kosher or picking salt
- 2 bay leaves optional
- 1 whole garlic clove peeled optional
Instructions
- Wash tomatoes and core them with a corer or serrated knife.
- Place large stainless steel pot on stove and turn heat to medium. One pound at a time, chop tomatoes into quarters, place in hot pot, and mash with a potato masher. Repeat until all tomatoes are in the large pot.
- Reduce heat and allow to simmer until mixture is reduced by ½ and vegetables are cooked. Skins should release from the flesh. Stir frequently to prevent tomatoes from sticking and burning. This should take 1- 1½ hours.
- Place your tomato mixture through a food mill or use a wooden spoon to press the mixture in batches through a fine mesh strainer or sieve. Discard solids.
- Return the remaining tomato mixture to a large saucepan. Add citric acid and stir to combine. Add salt and optional bay leaves and garlic clove. Stir to combine.
- Heat mixture over medium-low and simmer until it thickens to a paste. Stir frequently. This could take 2-5 hours. Remove bay leaves and garlic when desired consistency is reached.
- Meanwhile, prepare jars in your water bath canner and sterilize jar lids.
- Use a funnel to fill jars with tomato paste. Leave ½ inch headspace. Use a small rubber spatula to remove air bubbles and carefully place lids on jars. Gently tighten bands.
- Process in your water bath canner for 45 minutes (adjusting for altitude). See notes.
- Turn off heat and allow jars to cool in the canner for an additional 5 minutes.
- Remove jars from the canner, place them on a clean towel, and check after 12-24 hours for a proper seal.
- Label and store your sealed jars in a location out of direct sunlight for over a year. Any that have failed to seal can be placed in the fridge and used first.
Notes
- Adjust your processing time based on your altitude. Check out this chart.
- The original recipe from the National Center for Home Preservation claims to make 8 or 9- 1/2 pint jars, but depending on the water content of your tomatoes that amount could vary greatly.

Leave a Reply