Are you working with a small outdoor garden space but still yearning to grow a fruit tree? The espalier technique for fruit trees makes growing these edible delights possible in small spaces. You can enjoy hand-picked fruit from your backyard with a little bit of attentive pruning. This is not necessarily for the low-maintenance gardener, but if you’re willing to put in some time there are some definite benefits from learning how to espalier fruit trees.
How to Espalier Fruit Trees
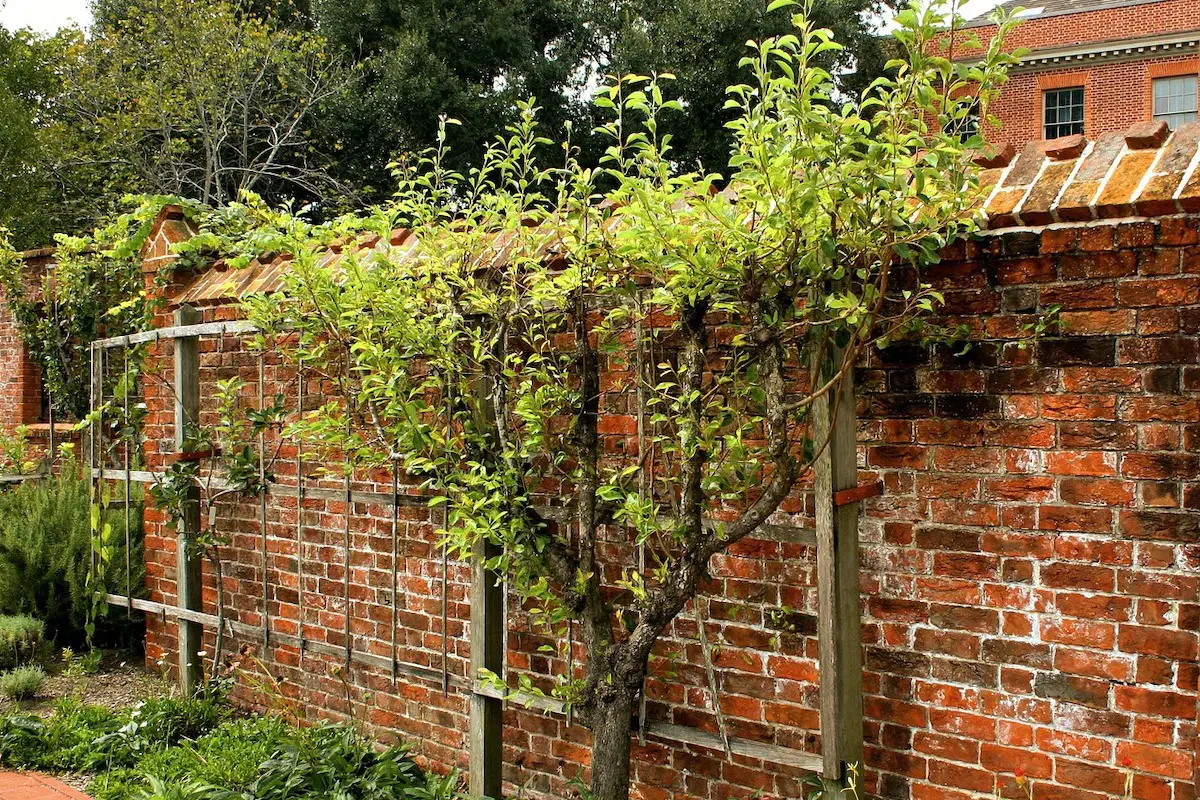
With the espalier technique, you will train and prune your trees to grow horizontal branches (or branches in other specific directions) along a support- whether that be a fence, wall, or trellis. Nearly all woody plants can be trained with this method, but popular choices are fruit trees, evergreens, vines, or shrubs. Plants with long, flexible branches are easiest to espalier.
Why?
It is both a decorative and functional technique.
More fruit- Through intense pruning, energy is directed away from the typical abundant growth of vertical branches and into the lateral fruit-bearing branches. You will likely see greater yields from your trees using this technique.
Smaller footprint- It should be visually evident that using espalier works to reduce the footprint of your trees. You can grow in smaller, tighter spaces and even grow healthier trees because of the excellent air circulation they receive through prunings.
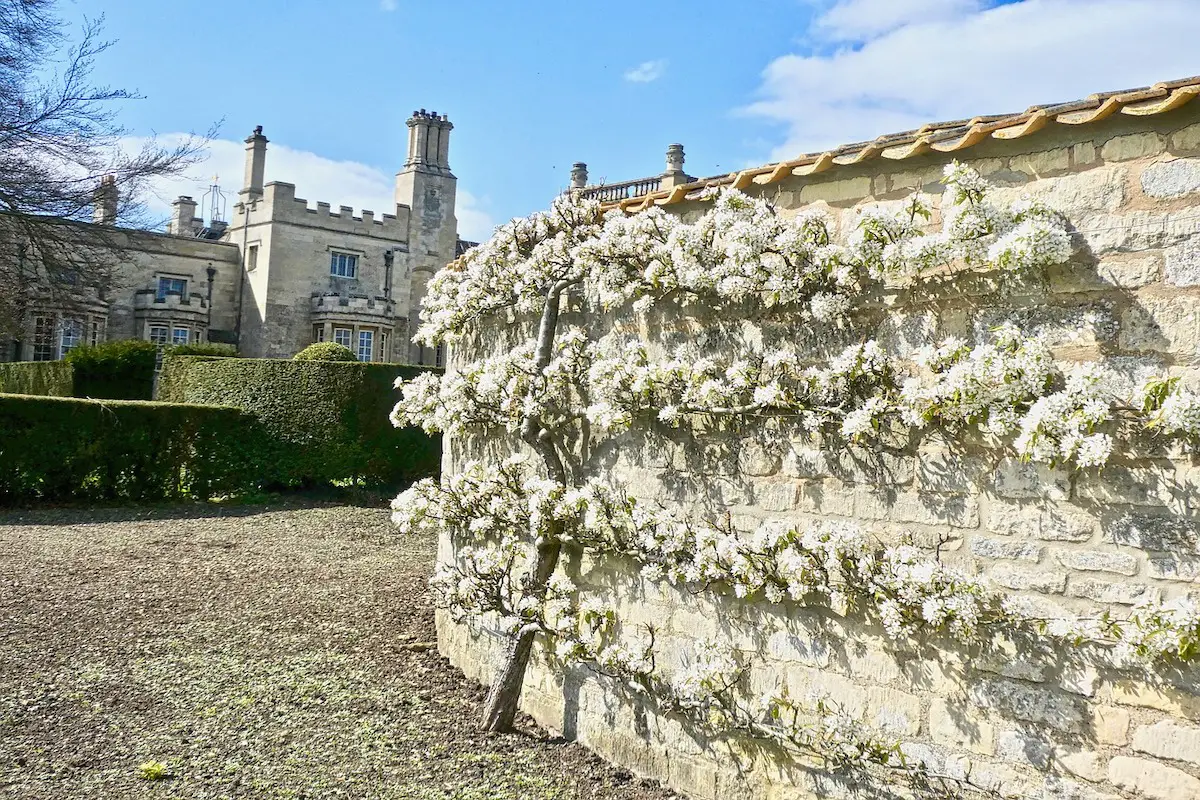
Use of Microclimate- Walls (especially south-facing) can radiate heat unfound elsewhere on your property. You might find that trees otherwise unable to survive in your particular zone will benefit from the microclimate created by growing against a wall.
Multiple Varieties- With this pruning system, you have the opportunity to graft multiple varieties of fruit onto the same tree. Here’s a thorough introduction to grafting.
Aesthetic value- Intense pruning makes for a clean, well-defined design in your landscape. The patterning is truly artful and visually appealing.
History
The word “espalier” is French and was derived from the Italian word “spalliera”. The technique is believed to have originated with the Romans but was transformed into an art form by the Europeans. In the Middle Ages, they used it mainly inside their castle or monastery walls to border large garden spaces without interfering with their open courtyards. Some classic styles appear to have been used in the 16th and 17th centuries in a more practical sense- to allow marginal climates to partake in fruit production.
It is evidenced that the technique was used in America as early as the 18th century.
Espalier Shapes
The four traditional patterns used within this technique are Cordon, Fan, Candelabra, and Belgian Fence (or Lattice).
Cordon- The most common, this pattern involves training rows of horizontal branches as tiers from one vertical trunk.
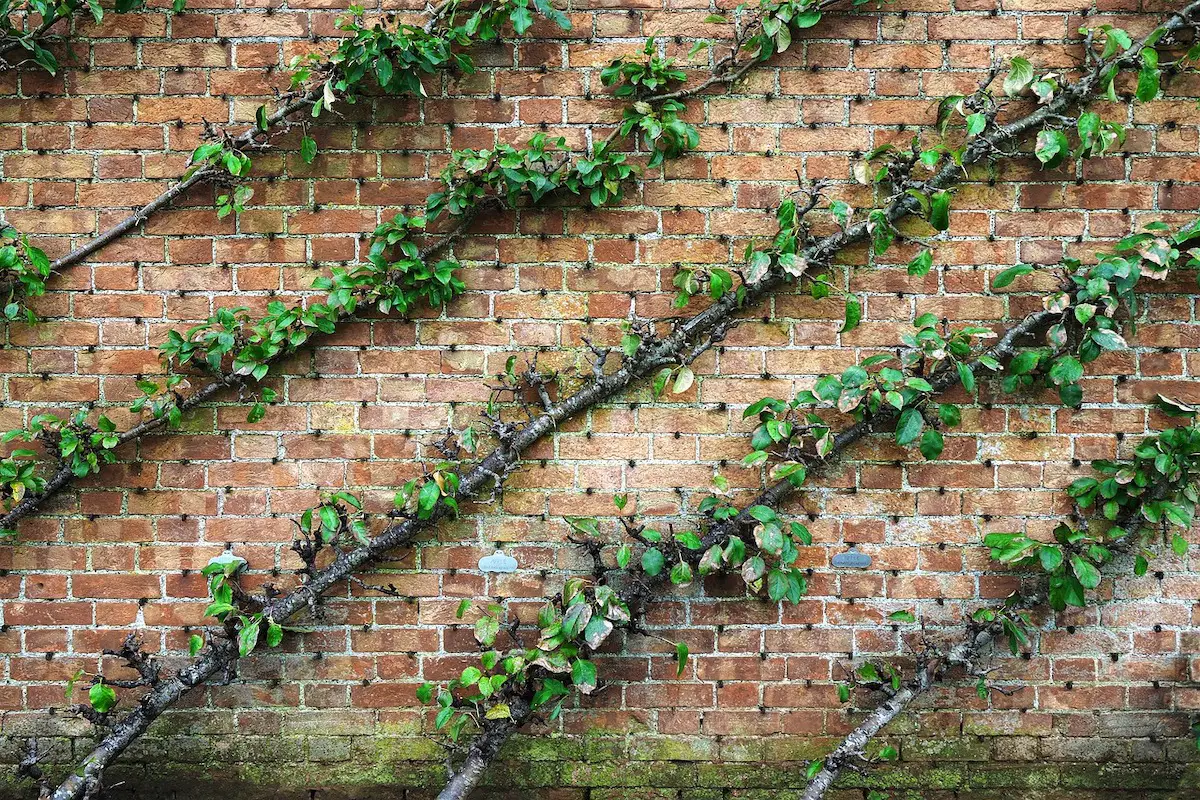
Fan- This looks like it sounds- it has a single trunk with branches trained at 45-degree angles to splay out like a fan.
Candelabra- With a shape like a candelabra, this pattern is based on training several branches horizontally from a main trunk and then having branches extend at 90-degree angles upward from their ends.
Belgian Fence- This involves planting several trees in a row and pruning each to a “V” shape for a lattice effect.
Planting
Establish Trellis- You will need a trellis (commonly made out of wood or wire) either as a stand-alone piece or as something to mount on a wall. You’ll want your structure to have horizontal supports spaced equally apart in height.
Choose Tree- The most common fruit trees used as espalier subjects are apples and pears followed by cherries, pomegranates, and peaches. Trees of nectarines, apricots, and plums require more attentive and careful pruning. Smaller (dwarf) varieties will be simpler to train on all accounts. Think about the pliability of your branches when choosing a tree.
Plant- Check the pH of your soil to make sure the tree you choose will thrive in its location. You should add compost and any other necessary amendments for your particular soil at this time. The ideal time for planting is when your tree is dormant- in winter or early spring when the soil is workable.
Plant your tree 6-12” away from the base of your wall or structure. Dig a hole to where the base of your tree will match the surface of the existing soil and make sure its roots have good soil contact and get watered in well. You want it positioned to where at least two of its strongest branches run in the direction of the wires.
Pruning- Your main pruning will be done in late winter/early spring when the plant is dormant (or after it flowers if it is a spring bloomer). This is the time to remove any growth that doesn’t align with your pattern. The tree’s growth needs to be redirected to the buds that face the direction you want the branches to grow.
Trellis- You’ll want to tie your branches while they are still young, soft, and easy to manipulate- which will likely be late spring or early summer. If the sap is showing signs of running, then the branches will be easier to manipulate. You can gradually bend the branches to their extreme by checking on the ties periodically and tightening them. You may use soft string, rubber grafting bands, plant ties, or raffia to tie the branches.
Each year you can work to establish a new tier of growth. If you rush your tree to branch into its tiers too early, it will suffer in strength along its bottom tiers. Give each tier a year’s time to grow and establish.
*This pruning/trellising advice is geared towards the cordon pattern, and each pattern will have its own specific pruning guidelines.
Maintenance- Once your tree is mature, it will still require shaping every month or two. You’ll need to prune off any branches that don’t follow your chosen espalier pattern.
FAQs (Frequently Asked Questions)
Early spring or late winter, when the tree is still dormant, is the ideal time to start training an espalier. This allows for shaping before the growing season begins.
Yes, planting beneath espaliered trees is possible, but choose companion plants that won’t compete for nutrients or water. Groundcover plants or shallow-rooted vegetables are good options.
Regular inspection, proper pruning to encourage air circulation, the addition of organic matter if necessary, and maintenance of the area around the tree will go a long way in keeping your trees healthy.
More Growing Tips
Refine your garden or outdoor spaces with some of these guides.


i sues this method when I ahd a very small back yard in Madison some 33 years ago. I was in love with red bud trees in Spring and pruned it, fanned it out to be along the tence. your presentation in the blaog is a good idea for those with small garden spaces.
Do you have a particular recommendation for something to measure the pH?
A pH testing kit (Which involves the use of pH test strips) is an easy solution for the home gardener! You can find them online, likely at your local garden store, or through your local cooperative extension office.